Setting Up NVIDIA Omniverse Nucleus on Windows 11 with Docker Desktop GUI

NVIDIA Omniverse Nucleus is a collaboration and database engine that serves as the backbone for 3D content creation, digital twins, and simulation workflows. It enables real-time collaboration between teams and provides the infrastructure needed for robotics training, Isaac Sim simulations, and AI-powered automation systems. Nucleus acts as the central hub that connects various Omniverse applications and allows seamless data sharing across different tools and platforms.
Trying to setup Nucleus on Ubuntu using Docker failed miserably. I had a spare Windows box lying around and was able to get Nucleus running with very little effort. This guide walks through setting up NVIDIA Omniverse Nucleus Stack 2023.2.8 on Windows 11 using Docker Desktop's graphical interface. Most of the work is done through Docker Desktop's user-friendly GUI, making it accessible even if you're not comfortable with command lines.
Prerequisites
- Windows 11 Pro or Enterprise (Docker Desktop requires Hyper-V)
- At least 16GB RAM (32GB recommended)
- 50GB+ free disk space
- NVIDIA GPU (recommended for optimal performance)
- Administrative privileges on your system
Step 1: Install Docker Desktop
Download and Install
- Go to Docker Desktop for Windows
- Download the installer
- Run as Administrator and install with these settings:
- ✅ Enable Hyper-V Windows Features
- ✅ Install required Windows components for WSL 2
- Restart your computer when prompted
Configure Docker Desktop Resources
- Launch Docker Desktop
- Click the Settings gear icon in the top-right
- Go to Resources → Advanced:
- CPUs: Set to 6-8 cores (or half your available cores)
- Memory: Allocate 16GB (or 75% of your RAM)
- Disk image size: Set to 100GB+
- Click Apply & Restart
Step 2: Download NVIDIA Omniverse Nucleus Stack
Get the Files
- Visit NVIDIA Omniverse Enterprise Downloads
- Sign in with your NVIDIA Developer account
- Download Nucleus Stack 2023.2.8 (.tar.gz file)
- Create a folder: C:\Omniverse\nucleus-2023.2.8\
- Extract the .tar.gz file to this folder using 7-Zip or similar
Step 3: Load the Stack in Docker Desktop
Import Using Docker Desktop GUI
- Open Docker Desktop
- Navigate to Images tab in the left sidebar
- Option A - If you have individual image files:
- Click "Load from .tar file"
- Browse to your extracted Nucleus files
- Select the main image file and load it
- Option B - Using Compose (Recommended):
- Open File Explorer and navigate to C:\Omniverse\nucleus-2023.2.8\
- Look for docker-compose.yml file
- Right-click and "Open with" → Notepad to verify contents
Import via Docker Desktop Compose
- In Docker Desktop, go to Containers tab
- Click "Create" or "Run" button
- Choose "From Docker Compose"
- Browse to your C:\Omniverse\nucleus-2023.2.8\docker-compose.yml file
- Docker Desktop will automatically read the configuration
Step 4: Configure Before Starting
Review Configuration in Docker Desktop
- Before starting, Docker Desktop will show you:
- Services that will be created
- Port mappings (look for port 8888)
- Volume mounts for data storage
- Environment variables
- Modify ports if needed:
- If port 8888 is already used, change it to 8889 or another port
- Click on the service and edit port mappings in the GUI
Set Environment Variables (Optional)
- In the Docker Desktop interface, you can set environment variables:
- NUCLEUS_PORT=8888
- POSTGRES_PASSWORD=your_secure_password
- Any other custom settings
Step 5: Deploy Using Docker Desktop
Start the Stack
- Click "Deploy" or "Start" in Docker Desktop
- Monitor the deployment:
- Docker Desktop will show pull progress for each image
- You'll see containers starting up one by one
- Status indicators will turn green when ready
Monitor in Docker Desktop GUI
- Go to Containers tab - you should see:
- nucleus-server (running)
- nucleus-postgres (running)
- nucleus-auth (running)
- Other related services
- Check container health:
- Green dot = healthy and running
- Yellow/Red = issues that need attention
- View logs easily:
- Click on any container
- Click "Logs" tab to see real-time output
- No command line needed!
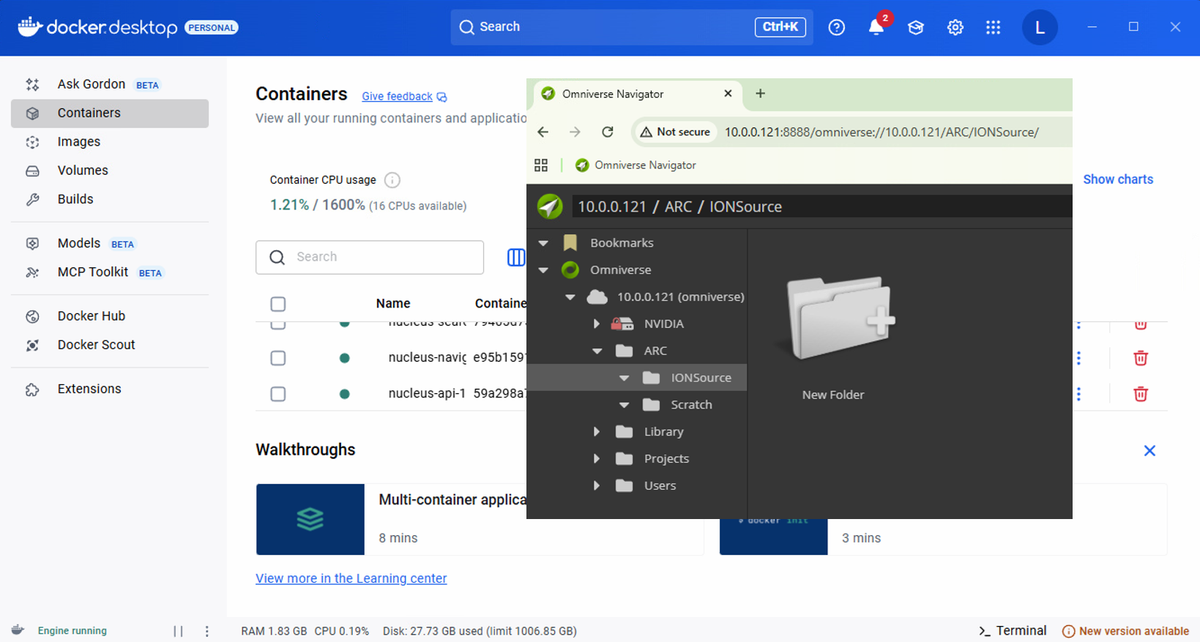
Step 6: Access Your Nucleus Server
Test the Connection
- Open your web browser
- Navigate to: http://127.0.0.1:8888
- You should see the Omniverse Nucleus web interface
Initial Setup Through Web Interface
- First-time wizard will guide you through:
- Creating admin account
- Basic configuration
- Setting up authentication (if desired)
- Configure users and permissions through the web UI
Step 7: Managing with Docker Desktop GUI
Daily Operations
Starting/Stopping Services:
- Go to Containers in Docker Desktop
- Click the play/pause buttons next to each service
- Or right-click for more options like restart, delete, etc.
Viewing Resource Usage:
- Containers tab shows CPU and memory usage for each service
- Troubleshoot performance issues by monitoring resource consumption
Managing Storage:
- Volumes tab shows all data volumes
- Backup important data by browsing volume contents
- Clean up unused volumes when needed
Troubleshooting with Docker Desktop GUI
Container Issues:
- Red status indicators mean problems
- Click the container → Logs tab to see error messages
- Restart containers with the restart button
- Recreate containers if needed using the GUI
Port Conflicts:
- Containers tab → click your nucleus service
- Edit port mappings in the configuration
- Apply changes and restart
Resource Problems:
- Go to Settings → Resources
- Increase memory/CPU allocation
- Apply & Restart Docker Desktop
Step 8: Integration and Next Steps
Connecting Isaac Sim
- In Isaac Sim settings:
- Server URL: http://<IP of Windows Box>:8888
- Use credentials from your Nucleus setup
Why This GUI Approach Works Better
- Visual feedback - see exactly what's running and what's not
- Easy troubleshooting - logs and status are right there
- Resource monitoring - spot performance issues immediately
- Simple management - start, stop, restart with clicks
- No command line knowledge required
- Built-in cleanup tools keep your system tidy
Conclusion
NVIDIAs Omniverse Nucleus Stack can be set up entirely through Docker Desktop's intuitive interface.
Below is a summary of the issues we encountered setting up Nucleus on Windows 11, the fixes that worked for us.
⚠️ Problems We Encountered (Windows 11)
1) Port & Firewall Conflicts
Nucleus relies on multiple ports (commonly 3009, 3010, 3085, 3086). Windows Defender Firewall rules initially blocked discovery and client connections from Omniverse apps.
2) Authentication Friction
Sign-in from Launcher to Nucleus occasionally hung/time‑out. Differentiating local Windows credentials vs. NVIDIA account added confusion.
3) Storage & Permission Errors
Nucleus needs write access to its data directories. Under restricted accounts or aggressive UAC, we saw database write errors and service crashes until permissions were corrected.
4) Performance Instability on Big Syncs
Large USD syncs sometimes lagged or paused the service. Ensuring Cache was installed and running improved transfer smoothness.
5) LAN Visibility
Remote clients on the same network couldn’t always "see" the Nucleus host—ultimately traced to Network Discovery disabled and missing firewall exceptions.
BTW. If you happen to have success installing Nucleus on Ubuntu Jammy, share your journey!